
Prior to attempting a repair on an LED light, make sure you carry out these preparatory steps:
- Assess the damage and decide if a repair or replacement is more cost-effective.
- Gather all tools like screwdrivers, pliers, wire cutters and a soldering iron.
- Research and educate yourself on LED repair techniques.
- Consult professionals or seek expert advice.
- Check the warranty status of your LED light.
- Lastly, practice caution and safety during the repair process. Disconnect power sources and wear protective gear.
- Don’t forget to check if your LED light just needs new batteries or if there’s something spooky going on!
Contents
Assess the LED Light Repair Need
To work out if a LED light repair is necessary, it’s important to check the condition of the light fixture. Are there any visible damages? Is it malfunctioning? How about brightness and performance?
Let’s note the assessment criteria in a table:
| Assessment Criteria | Condition |
|---|---|
| Visible Damages | None |
| Malfunctioning | No |
| Brightness | Optimal |
| Performance | Satisfactory |
Evaluating these factors will help you decide if a repair is needed. Take into account each aspect carefully and make an informed decision. Regular cleaning and maintenance of LED lights can also help them last longer.
Before you begin a LED light repair, remember to gather your tools and materials. Otherwise, you could be in for a shocking experience!
Gather Necessary Tools and Materials
Gathering the right tools and materials for an LED light repair is essential. Here’s what to keep in mind:
- Put together a list of tools.
- Have different screwdrivers, like flathead and Phillips head.
- Bring a multimeter to test voltage levels.
- Don’t forget electrical tape.
- Have wire cutters & strippers ready.
- Stock up on spare parts like resistors, capacitors & diodes.
Also, have a well-lit, well-ventilated workspace. Stick to safety guidelines when handling electricity. Doing so will make your repair process smoother.
Before you get to work, remember to turn off the power!
Turn Off the Power Supply
When repairing LED lights, never overlook turning off the power supply. Why is this so important? To keep yourself safe and avoid any electrical hazards, it’s a must! Here’s how to do it right:
- Find the circuit breaker. It’s usually in the basement or utility room.
- Identify the correct switch labeled “lights” or “LED lights”.
- Push down on it until you hear a click or feel resistance.
- Double-check to make sure all affected LEDs are off.
Safety is key when it comes to electrical repairs. Don’t be shocked by surprises – turn off the power supply and keep your LED lights from going haywire.
Check for Loose Connections
Loose connections can cause LED lights to not work properly. It’s best to inspect for them before attempting repairs. Follow these steps:
- Turn off power supply. This prevents electric shocks or accidents.
- Examine wiring, looking for loose or disconnected wires. Make sure all wires are connected and secure.
- Tighten any loose screws or connectors with a screwdriver or pliers. Don’t over-tighten, as this can cause damage.
- Turn power back on and test to see if the LED light is working. If it still isn’t, further inspection or repair might be needed.
- If you can’t identify or fix the issue, call a professional electrician or technician who specializes in LED lights.
Remember to clean and maintain your LED lights regularly. This helps them last longer and work better, so you won’t need to repair them often.
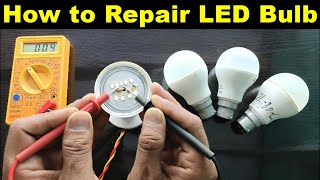
Inspect for Damaged Components
- To fix LED lights, check for any broken parts. This is to spot the core issue and decide what to do.
- Have a look at the LED light fixture. Is there any cracking, dents, or loose wiring? Also, inspect for any worn-out or corroded parts. Note down anything unusual.
- Then, take off the cover or panel to reach the inside. Look carefully at the power supply and circuit boards. Note if there’s burning, swollen capacitors, or loose connections. These can affect the LED light’s performance.
- Test the elements one by one. Assess the LEDs. Are they in good condition and soldered? Use a multimeter or similar tool to measure voltages and continuity. Note anything strange.
- Say goodbye to flickering lights and welcome a brighter home. Replace those faulty LED bulbs – unless you fancy a disco vibe.
Replace Faulty LED Bulbs
Replacing faulty LED bulbs is an essential job. Here’s a step-by-step guide to do it right!
- First, check to see if the bulb is flickering or not illuminating.
- For safety, turn off the power supply of the affected area.
- Carefully remove the faulty bulb from the socket without using too much force.
- Clean the socket with a soft cloth or brush if necessary.
- Insert the new LED bulb and twist it clockwise until secure.
- Turn on the power supply and check if the new LED bulb works.
Choose high-quality LED bulbs that are compatible with your lighting fixtures. If you have any issues, consult a professional electrician for help.
Replacing faulty LED bulbs will not only make your space brighter, but also help save energy. So be a detective and make sure the repaired LED light shines brighter than anything!
Test the Repaired LED Light
Testing the fixed LED light is vital to make sure it works well and satisfies your needs. Follow this 6-step guide to test your fixed LED light:
- Turn on the LED light and observe how it behaves. Check if it lights up quickly, or if there are any delays.
- Evaluate the brightness of the LED light. Compare it to other LED lights or its past versions to see if it’s at its best.
- Look at the color temperature of the light. Make sure it matches your preferred lighting atmosphere and suits the environment.
- Test different dimming levels, if possible, to check if your fixed LED can change its brightness as you want.
- Check if flickering or strobing occurs when you dim the LED. This could point to a faulty repair job or compatibility problems with your electrical system.
- Finally, assess the overall performance and stability of your LED light over a period of time. Look for any strange behavior, like overheating or malfunctioning after long use.
Additionally, read any specific testing instructions from the repair technician or manufacturer to be sure you inspect your LED light’s functionality and performance properly.
By doing a detailed test, you can be sure that your LED light meets your expectations and will provide trustworthy lighting for many years. Remember, testing is an essential part of ensuring the success of any repair and getting the most out of LED lighting technology.
Saving money by doing repairs yourself is great, but if your problem-solving skills aren’t as good as your cooking skills, you should get help from the experts.
Troubleshooting Tips and Common Issues
When it comes to LED light repair, it can be tricky. But, with the right tips and a good understanding of common problems, you can easily fix your LEDs without any hassle.
First off, check the power source. Make sure the outlet is working and there are no loose connections. Next, inspect the wiring for any damage or loose connections. Replace any faulty or damaged wires.
Test the LED driver using a multimeter. If it’s not working, consider replacing it. Additionally, overheating can lead to performance problems. Make sure there is proper ventilation and the LED isn’t exposed to too much heat. Fans or heat sinks can help.
When it comes to LEDs, handle with care. Avoid touching their surface directly, and follow manufacturer installation guidelines.
These tips are key for fixing LED lights. Proactive measures can save both time and money. So, before you toss the LED light, try all these tips – ’cause not only the bulb is fragile, but your bank account too!
Conclusion
LED lights have become popular in the modern world for lighting solutions. However, they can have issues and require repair. Before opting for repair, here’s what you should do:
- Identify the problem. Is it not turning on? Is the brightness low? Is it flickering or having strange colors? Knowing the issue helps assess if a repair is needed or if simpler steps can be taken.
- Research the warranty and return policy. Many manufacturers offer warranties that cover repairs or replacements. Knowing your rights can help with repair without extra costs.
- Consult technicians. They have expertise to diagnose and fix complex issues that may escape an amateur. They can also recommend repair services or advise on whether replacing the LED light is better.
- Weigh the cost of repair against buying a new LED light. In some cases, repairs may be expensive or take time to source parts. If the cost of repairing is more than the value of the LED light, or newer models offer upgraded features, investing in a replacement might be a better choice.
Frequently Asked Questions
FAQs on Things You Should Do Before Opting For A LED Light Repair:
Q1: How can I determine if my LED light needs repair?
A1: Some common signs include flickering or dimming lights, complete light failure, or a burning smell. However, it’s best to consult a professional to accurately diagnose the issue.
Q2: Can I fix an LED light myself?
A2: It depends on the complexity of the issue. Simple tasks like changing a bulb or fixing loose connections can be done by yourself. However, for more significant repairs, it’s recommended to seek professional assistance.
Q3: Should I consider replacing the LED light instead of repairing it?
A3: In some cases, especially if the light is outdated or the cost of repair exceeds the value of the light, replacing it might be a more cost-effective and energy-efficient option. Discuss with a professional to make an informed decision.
Q4: What are the potential risks of attempting DIY LED light repair?
A4: DIY repairs without proper knowledge and experience can lead to electrical hazards, further damage to the light, or personal injury. It is always safer to let professionals handle complex repairs.
Q5: How can I find a reliable LED light repair service?
A5: Look for certified electricians or lighting professionals who specialize in LED light repair. Read reviews, ask for referrals, and ensure they have the necessary qualifications and experience.
Q6: What should I do before opting for LED light repair?
A6: Before seeking repair, try basic troubleshooting steps such as checking the power source, ensuring proper installation, cleaning the light, and replacing batteries or bulbs. These simple actions may solve minor issues without the need for repair.